styled()
创建样式组件(styled components)的工具
Introduction
All the MUI components are styled with this styled() utility. This utility is built on top of the styled() module of @mui/styled-engine and provides additional features.
引用路径
You can use the utility coming from the @mui/system package, or if you are using @mui/material, you can import it from @mui/material/styles. You can use the utility coming from the @mui/system package, or if you are using @mui/material, you can import it from @mui/material/styles. 区别是如果 React Context 上下文中没有可以用的主题的情况下,后者会自带默认的主题 theme。
这解决了什么问题?
The utility can be used as a replacement for emotion's or styled-components' styled() utility. It aims to solve the same problem, but also provides the following benefits:
- It uses MUI's default
themeif no theme is available in React context. - It supports the theme's
styleOverridesandvariantsto be applied, based on thenameapplied in the options (can be skipped). - It adds support for the the
sxprop (can be skipped). - It adds by default the
shouldForwardPropoption (that can be overridden), taking into account all props used internally in the MUI components:ownerState,theme,sx, andas.
API
styled(Component, [options])(styles) => Component
Arguments
Component: The component that will be wrapped.options(object [optional]):options.shouldForwardProp((prop: string) => bool[optional]): Indicates whether thepropshould be forwarded to theComponent.options.label(string [optional]): css 样式后缀 Useful for debugging. Useful for debugging.options.name(string [optional]): 会根据此属性在theme.components中找到相应的styleOverridesandvariants并应用到组件上 同时也会用来生成labelAlso used for generating thelabel.options.slot(string [optional]): IfRoot, it automatically applies the theme'svariants.options.overridesResolver((props: object, styles: Record<string, styles>) => styles [optional]): Function that returns styles based on the props and thetheme.components[name].styleOverridesobject.options.skipVariantsResolver(bool): 不再自动装配theme.components[name].variantsoptions.skipSx(bool [optional]): 该组件禁用sx属性- 其它选项会透传到 emotion's
styled([Component], [options])的options参数.
Returns
Component :已创建的新组建。
Basic usage
If you inspect this element with the browser DevTools in development mode, you will notice that the class of the component now ends with the MyThemeComponent-root, which comes from the name and slot options that were provided.
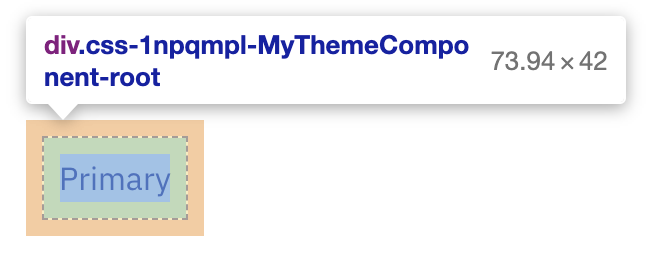
In addition to this, the color, sx, and variant props are not propagated to the generated div element.
如何禁用
If you would like to remove some of the MUI specific features, you can do it like this:
 const StyledComponent = styled('div', {}, {
   name: 'MuiStyled',
   slot: 'Root',
-  overridesResolver: (props, styles) => styles.root, // 禁用 theme.components[name].styleOverrides
+  skipVariantsResolver: true, // 禁用 theme.components[name].variants
+  skipSx: true, // 禁用 sx 参数
 });
创建自定义的 styled()工具
如果你想让你的styled()工具使用一个不同的默认主题,你可以用createStyled() 工具很轻松的创建一个你自己的版本。
import { createStyled, createTheme } from '@mui/system';

const defaultTheme = createTheme({
  // your custom theme values
});

const styled = createStyled({ defaultTheme });

export default styled;
Difference with the sx prop
The styled function is an extension of the styled utility provided by the underlying style library used – either Emotion or styled-components. It is guaranteed that it will produce the same output as the styled function coming from the style library for the same input.
The sx prop, on the other hand, is a new way of styling your components, focused on fast customization. styled is a function, while sx is a prop of the MUI components.
Therefore, you will notice the following differences:
sx provides more shortcuts than styled
With styled:
const MyStyledButton = styled('button')({
  mx: 1, // ❌ don't use this! This shortcut is only provided by the `sx` prop
}); This shortcut is only provided by the `sx` prop
});
With sx:
import Button from '@mui/material/Button';

const MyStyledButton = (props) => (
  <Button
    sx={{
      mx: 1, // ✔️ this shortcut is specific to the `sx` prop,
    }}
  >
    {props.children}
  </Button>
);
The style definition varies slightly
With styled:
const MyStyledButton = styled('button')({
  padding: 1, // means "1px", NOT "theme.spacing(1)"
});
With sx:
import Button from '@mui/material/Button';

const MyStyledButton = (props) => (
  <Button
    sx={{
      padding: 1, // means "theme.spacing(1)", NOT "1px"
    }}
  >
    {props.children}
  </Button>
);
Patterns for how to use props differ
With styled:
const MyStyledButton = styled('button')((props) => ({
  backgroundColor: props.myBackgroundColor,
}));
With sx:
import Button from '@mui/material/Button';

const MyStyledButton = (props) => (
  <Button sx={{ backgroundColor: props.myCustomColor }}>{props.children}</Button>
);
Parameter when using function are different for each field
With styled (not recommended):
// You may find this syntax in the wild, but for code readability
// we recommend using only one top-level function
const MyStyledButtonPropsPerField = styled('button')({
  backgroundColor: (props) => props.myBackgroundColor,
});
With sx:
import Button from '@mui/material/Button';
import { lighten } from 'polished';

const MyStyledButton = (props) => (
  <Button
    sx={{ backgroundColor: (theme) => lighten(0.2, theme.palette.primary.main) }}
  >
    {props.children}
  </Button>
);
// Note: for direct theme access without modification, you can also use a shortcut by providing the key as a string
const MyStyledButton = (props) => (
  <Button sx={{ backgroundColor: 'primary.main' }}>{props.children}</Button>
);
How can I use the sx syntax with the styled() utility?
If you are one of those who prefers the sx syntax and wants to use it in both the sx prop and the styled() utility, you can use the experimental_sx utility from the @mui/system:
The overhead added by using the experimental_sx utility is the same as if you were to use the sx prop on the component.
Note: You can use
experimental_sxoutside of thestyled()utility, too; e.g., for definingvariantsin your custom theme.
How to use components selector API
If you've ever used the styled() API of either emotion or styled-components, you should have been able to use components as selectors.
import styled from '@emotion/styled';

const Child = styled.div`
  color: red;
`;

const Parent = styled.div`
  ${Child} {
    color: green;
  }
`;

render(
  <div>
    <Parent>
      <Child>Green because I am inside a Parent</Child>
    </Parent>
    <Child>Red because I am not inside a Parent</Child>
  </div>,
);
With MUI's styled() utility, you can use components as selectors, too. When using @mui/styled-engine-sc (styled-components), nothing needs to be done. When using @mui/styled-engine (emotion), the default engine, there are a few steps you should perform: When using @mui/styled-engine-sc (styled-components), nothing needs to be done. When using @mui/styled-engine (emotion), the default engine, there are a few steps you should perform:
First, you should install @emotion/babel-plugin.
npm install @emotion/babel-plugin
Then, configure the plugin to know about the MUI version of the styled() utility:
babel.config.js
module.exports = {
  ...
  module.exports = {
  ...
  plugins: [
    [
      "@emotion",
      {
        importMap: {
          "@mui/system": {
            styled: {
              canonicalImport: ["@emotion/styled", "default"],
              styledBaseImport: ["@mui/system", "styled"]
            }
          },
          "@mui/material/styles": {
            styled: {
              canonicalImport: ["@emotion/styled", "default"],
              styledBaseImport: ["@mui/material/styles", "styled"]
            }
          }
        }
      }
    ]
  ]
};
Now you should be able to use components as your selectors!